Tag: best dessert

Peanut Butter Bacon Banana Bread

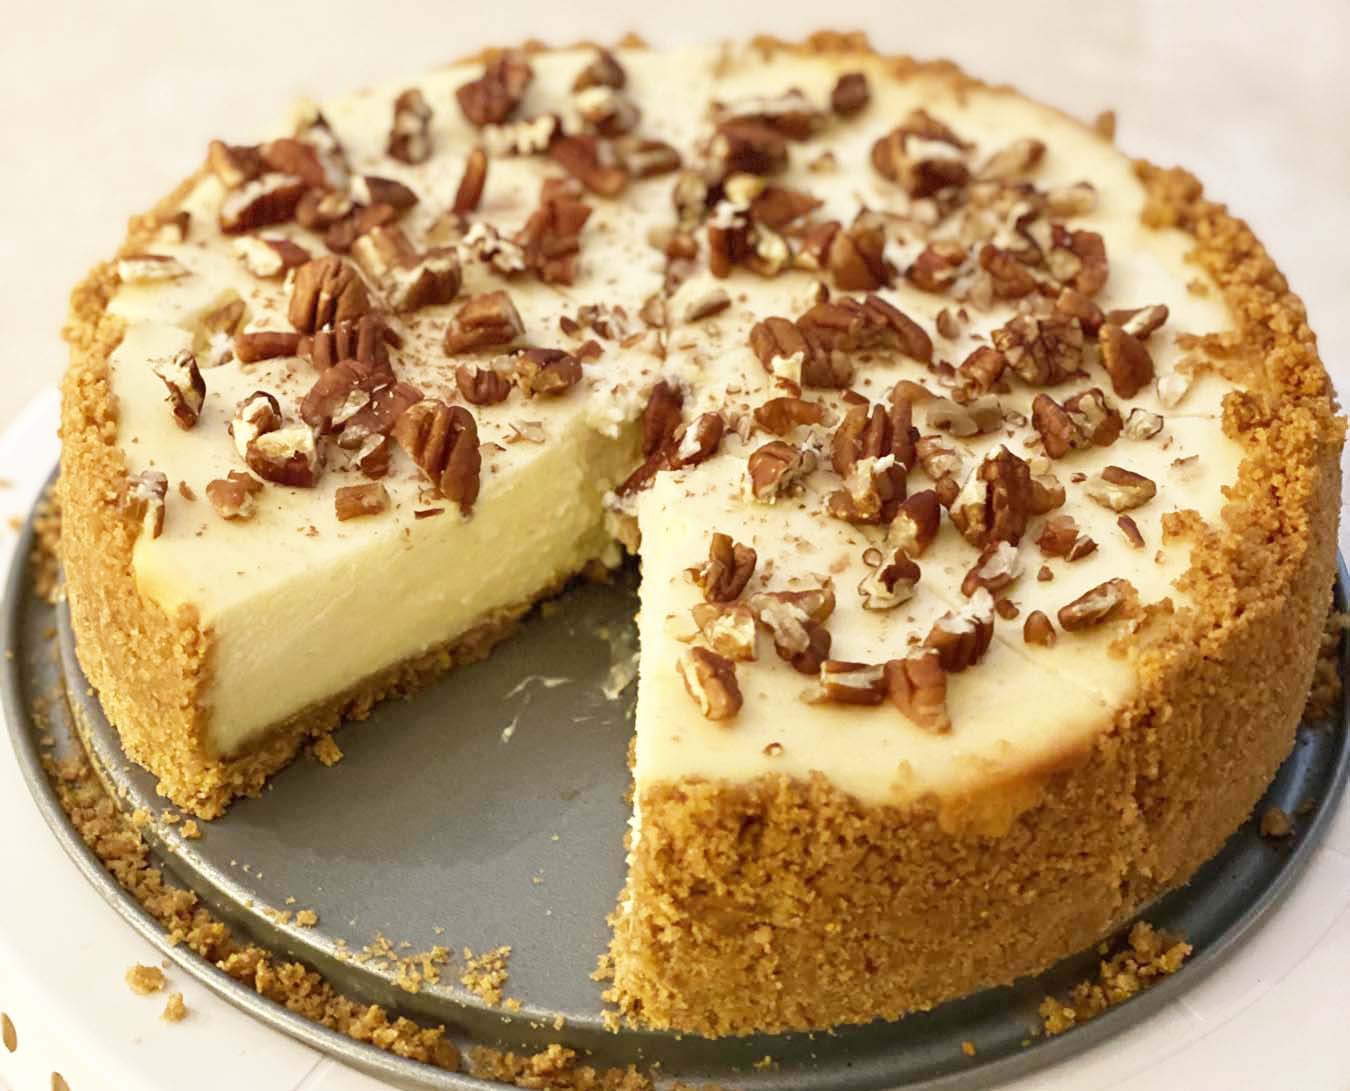
This Elvis-inspired “Peanut Butter Bacon Banana Bread” is a divine creation that features sweet and salty elements and great texture contrasts. It bakes perfectly too, coming out tender, yet firm enough to put on a stick. Among the judge’s comments: “very clever idea, delicious, and so state fair like.” We 100% agree.

Divine Elvis on a Stick


This recipe won first place in the Blue Ribbon Banana Bread Contest at the 2021 Minnesota State Fair. Karen Cope created it for the competition, trying several variations and testing them on neighbors before settling on this entry.

Karen is a perennial winner who took home her first county fair blue ribbon when she was just 9 years old. She wins a $100 King Arthur Baking Company gift card.

Step By Step Recipe Overview

The toothsome treat is fun to make with kids and is easier than you think.

Bacon Cooked, Reserved Bacon Grease

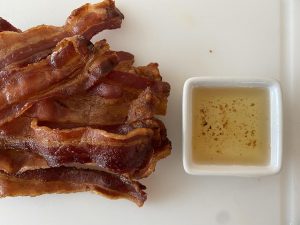
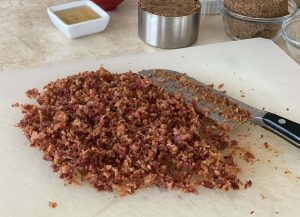
First off, you fry up the bacon crisp. Or leave it out if you’re not a fan. We’ve tasted it both ways, and both are phenomenal. Next you chop the bacon into small bits and set it aside as one of the toppings.

Bacon chopped for Peanut Butter Bacon Banana Bread

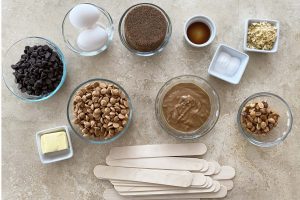
Next, prep your pans (grease, line with parchment), measure out your ingredients and set the oven to pre-heat to 350°F.

I love my stand-up mixture as it does the “heavy lifting” so well, an in blending ingredients smooth.

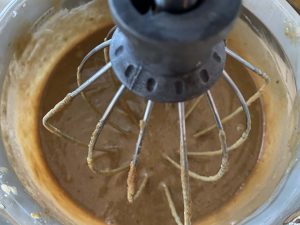
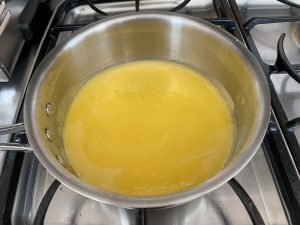
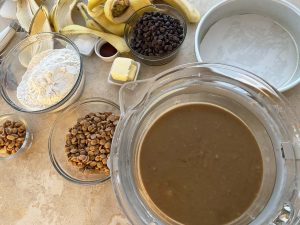
In this pic, I’ve already blended the bacon grease, butter, peanut butter, and brown sugar. I’m about to mashed my bananas.

I wish my bananas were more ripe than ^these^ ones shown above, but sometimes that’s all the grocery store has.

Perfectly Ripe Bananas for Banana Bread

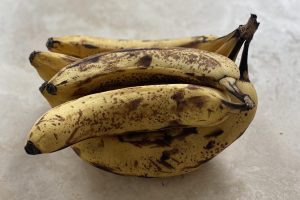
In my opinion, this is the ^ideal ripeness^ for banana bread. You could even go a bit more ripe. The aroma is very banana-y at this stage.

Mashed Bananas for Peanut Butter Bacon Banana Bread

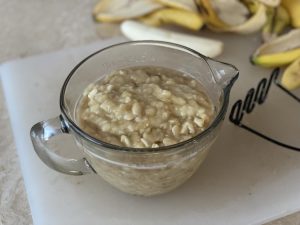
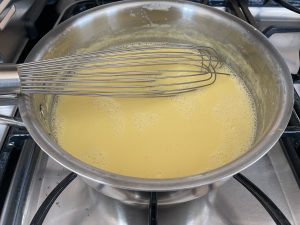
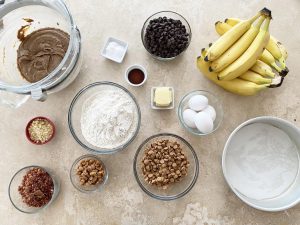
On this test run, I ended up doing a banana puree with an immersion blender with mine to eliminate bigger lumps. Once you combine the bananas with the eggs, vanilla, salt, and baking soda, you only need to mix in the flour, and half your chocolate chips and peanut butter chips. (You are saving the other half for drizzling.)

Peanut Butter Bacon Banana Bread - Prepped IngredientsMix only until just combined. Divide mixture between the two prepared pans. Batter will be quite thick, so level it out in the pan.

Batter in Pan - Peanut Butter Bacon Banana Bread

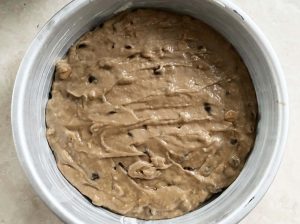
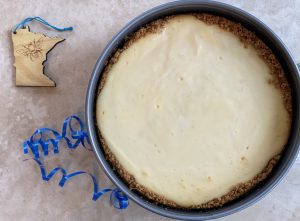
Bake for 20-25 minutes, until light golden brown and edges start to pull away from the sides. Tip: if you only have 8-inch cake pans, use them, and bake about 10 minutes longer. A toothpick inserted into center should come out clean, without chocolate. Cool on wire rack.

Toppings for Peanut Butter Bacon Banana Bread

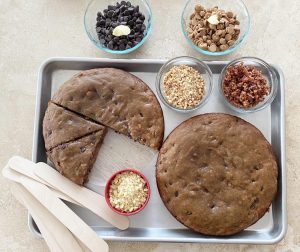
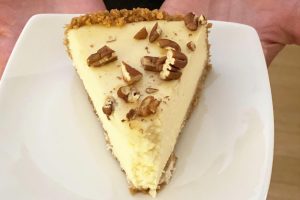
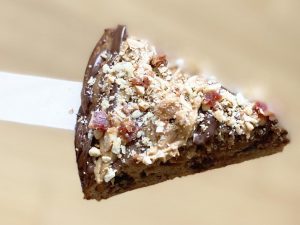
The last step is fun. You cut the bread into 16 servings, insert the wide, wooden sticks (3/4 inch wide is ideal), then do your toppings.

  • Melted peanut butter chips (with shortening)
  • Melted chocolate chips (with shortening)
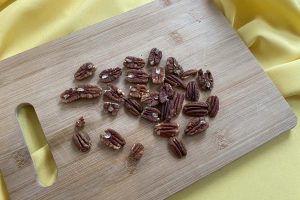
  • Chopped peanuts (Planters, honey-roasted)
  • Chopped banana chips (Trader Joe’s)
  • Bacon pieces

Tah Dah!

Elvis on a Stick

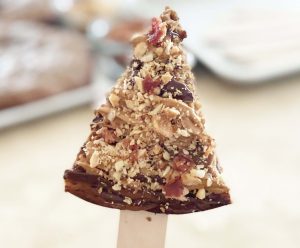
Now you have the best-ever banana bread to enjoy: Peanut Butter Bacon Banana Bread, Elvis on a Stick!

Happy noshing!

-Cyndi


Minnesota Honey Cheesecake Recipe

This Minnesota Honey Cheesecake Recipe won first place for best cheesecake at the Minnesota State Fair, two years in a row (2018 and 2019). One taste and it will be love at first bite. The thick graham cracker crust pairs perfectly with the rich, creamy and dreamy cheesecake itself. Learn how to make this blue ribbon winning dessert with the step by step recipe below. Recipe credit goes to Med Nodzon of St. Paul.

Slice of Minnesota Honey Cheesecake

What You’ll Need

Meg’s recipe comes out so moist and delicious. Round up these items to get started.

  • 8 1/2 inch springform pan
  • Minnesota honey
  • Cream cheese
  • Sour cream
  • Sugar
  • vanilla
  • eggs

With a pound and a half of cream cheese, you know this cheesecake is going to be divine. There’s a memorable tang to it also, thanks to the sour cream. For honey, we used our local The Beez Kneez brand in our test run and loved its flavor.  You can use a different size pan also. Just be sure to adjust the baking time.

We had Meg make her award-winning recipe so we could photograph it. It arrived looking perfect.

Minnesota Honey Cheesecake with ribbon

We took Meg’s suggestion of adding pecans on top. Chop, chop!

Nuts for Minnesota Honey Cheesecake

We all went nuts for how great this all tasted together.

Minnesota Honey Cheesecake

Just look at how dense yet creamy this slice is! You will delight in every bite.

Slice Closeup of MN Honey Cheesecake

Bake Like a Blue Ribbon Winner

Want to make a state-fair-winning Minnesota Honey Cheesecake on your own? Here are a few tips from Meg to re-create her cheesecake like a champ. The advice is especially helpful if you want a smooth top and texture to the cheesecake.

  • Don’t overmix the batter.
  • The water bath is key if you want to avoid cracks in the top. The added moisture ensures every forkful is creamy and dreamy. You pour boiling hot water into an outer, larger pan with the cheesecake in its own springform pan ‘floating” inside. It’s more sitting than floating, but you get the idea. Wrap the bottom twice with aluminum foil to seal it.
  • Turn the oven off as soon as the edges have firmed up. The cheesecake will have a jiggly center and look like only about an inch and a half around the parameter is cooked. Leave it set in the oven to finish setting up. Leave the oven open a crack, using a small spatula to hold the door partially ajar.  Allow it to cool to almost room temperature before chilling it in the fridge 6 or more hours, for best results.

By the way, if you love cheesecake like we do, make this epic raspberry pie at some point also.

Meet the Maker

Meg entered her first baking competition at the fair in 2013. Her granola bar won 3rd place and she was hooked. She entered every year after (except 2020), making anywhere from 4 to 13 entries. The most ribbons she won in a single year was nine. Her best ribbon was 1st place for gluten-free chocolate mint sandwich cookies, which also won the sweepstakes (best overall in its category).

While winning ribbons is a thrill (the more the better =), Meg says she also simply loves the process of it all, including the baking trial runs. Sharing “failures” with co-workers is a highlight too. She appreciates how they are always honest about which items they like best. Because that’s a win on its own.

Meg Nodzon

Make Meg’s cheesecake today for a tasty blue ribbon baking experience.

Enjoy-

Cyndi


Chocoholic Homemade Ice Cream

This Chocoholic Homemade Ice Cream will delight all of you chocolate lovers out there.

Dish of Chocoholic Homemade Ice Cream

The flavor is bold. Its intensity will wow your senses. Plus its soooo creamy and dreamy. Here’s what goes in it:

  • Egg yolks
  • Sugar
  • Heavy cream
  • Whole milk
  • Vanilla bean & extract
  • Unsweetened cocoa powder
  • Semisweet chocolate chips

That’s it! You won’t need an ice cream maker (but you can use one if you desire), or any special equipment or tools. Note this recipe doesn’t require sweetened condensed milk, which a lot of ice cream recipes do. By the way, they sound good to me as well (ones with sweetened condensed milk). I’ll make one of those next time around, for sure.

Easy to Make

My favorite characteristic of this decadent dessert, besides how it tastes, is how super simple it is to make. To get started, you whisk 6 egg yolks with sugar.

Yolks Sugar for Chocoholic Homemade Ice Cream

Then you add whole milk, cream, and a sliced vanilla bean, then slow cook it over low heat. Be sure to stir it constantly to avoid scorching and lumps.

Custard for Chocoholic Homemade Ice Cream

Together, the vanilla bean seeds and extract, give the custard a wonderful flavor and richness. 

As the last steps you mix in/melt chocolate chips and cocoa. I like to move the chilled custard from a bowl to a parchment-lined loaf pan. Then you stir it a couple times, just as it starts to freeze. I did these steps in the evening, then let it freeze overnight. The parchment made it easy to move the ice cream after the first servings to a sealable container. 

Chocoholic Scooped Homemade Ice Cream 6

Blue Ribbon Winner

Recipe credit goes to Jayson Aguilar. He won first place with it at the State Fair of Texas back in 2006. Dozens of people competed, but this creation stood out most to the judges. Intense flavor was one of the top judging criteria for the tasting panel of judges. One taste and you’ll know why this Chocoholic Homemade Ice Cream is a blue ribbon winner.

Chocolate Lover's Dream Ice Cream

Serving Tips

  • Put the frozen ice cream in the fridge about 30 minutes before you serve it. This results in nice rounded scoops. Since this ice cream recipe is a no churn version, the custard freezes rock hard. If you want it softened faster, set it on the counter for 5-10 minutes or more, depending how solid it has frozen. I prefer the fridge thaw as it softens more uniformly.
  • Serve with a berry dessert wine, or drizzle it over the ice cream, if desired, which is what the winner did when he presented it at the fair.
  • I also think it would work well with Kahlua or a sprinkling of salted nuts on top, i.e. almonds, peanuts, pistachios, or your favorite.
  • You could even mix in the nuts before it’s frozen or customize it with your favorite chocolate pairings. Peanut butter, pretzels, fresh berries are a few items that come to mind.

However you make it, I hope you enjoy it as much as I did.

-Cyndi


Sweet Savory Pear Dessert Pizza

This Sweet-Savory Pear Dessert Pizza features an unexpected ingredient combination that works deliciously.

Sweet Meets Savory Ingredient Combination

There’s cream cheese and brown sugar, as well as onion, bacon, and pecans, plus a mix of provolone and mozzarella cheese. The gorgonzola cheese is key. It is buttery and has a bite to it. Pair all that with the sweetness of fruit and honey, and you’ve got an amazing, unique, and award-winning dessert. In fact, this “best recipe” won 1st place at the Minnesota State Fair. It’s another all-time favorite from our archives.

Sweet Savory Pear Dessert Pizza Sliced

Recipe credit goes to Lynda Decker. She won the “best dessert pizza” that Fleischmann’s Yeast sponsored back in 2013. One of her tips is to try a flavored honey like raspberry honey, which she got at a Minnesota farmer’s market.

Delicious Crust, Creative Toppings

You start with an easy homemade pizza crust that you brush with butter and brown sugar. Make the dough ahead of time (two hours before baking or the day before). You par-bake the crust then add your toppings: a cream-cheese-brown-sugar layer, pear slices, onion, bacon, and two cheeses, including that slightly funky gorgonzola. You finish it with pecans and a drizzle of honey. Altogether it is a lot of ingredients, but wait until you taste it! Wow.

I was blown away when I first tasted this Sweet-Savory Pear Dessert Pizza. It is both creative and tantalizing to taste. This is a must make for any cheese lovers out there, as well as any foodies that like complex flavors, texture contrasts and surprising ingredient combinations.

Blue Ribbon Winning Recipe

At judging, long-time Minnesota State Fair Judge Mary Bartz shared her expert opinion about this pizza. (This pizza recipe has) a powerful combination…a savory and fruity sweet topping over a thin, tender, yet chewy crust…a dynamic result!

Be sure to bake this one up soon!

-Cyndi

Note: This is an edited repost from our former website, StateFairRecipes.com.

Dreamy Creamy Raspberry Pie

This dreamy creamy raspberry pie is true to its name. The “always-heavenly” heavy cream and cream cheese ingredients give this pie it’s richness. You use both frozen and fresh raspberries. Featuring this fruit makes the raspberry flavor a co-star to the cream. Each bite is divine thanks to the pie’s five layers.

Five Easy Layers

  1. pie crust
  2. baked “cheesecake”
  3. raspberry filling
  4. whipped cream cheese
  5. fresh raspberries

Everything goes inside a fabulous and flaky pie crust, homemade with cold butter and ice cold water, plus flour, salt, sugar, of course. And as always, if you’re in a time crunch (or have no interest in mastering your “pie crust from scratch” skills), a pre-made crust works too.  No questions asked.  No judging 😊

The pie’s bright color is eye-catching for sure, making it a scrumptious sweet treat for Valentine’s day…or any special day of the year for that matter. You can see all the layers well in this slice’s close up. (Personally, this pic makes me want to lick the screen. And I find the raspberries almost hypnotizing on top.)

Dreamy Creamy Raspberry Pie - Best Slice

Worth the Wait

Because of the chill times, this dreamy creamy raspberry pie will take a few hours to make, but please do not let that intimidate you. The raspberry filling thickens easily and the creamy layers are easy to whip up. For the crust, you use a food processor. If you don’t have a food processor, opt for a pastry blender. Just be sure to keep the butter cold and water ice cold.  The crust bakes beautifully and the delicious layers give it a complexity that wows the senses.

State Fair Winner

Recipe credit goes to Emily Olsen, who created it for the North Carolina State Fair, Gold Medal Flour best pie contest (2015). She won a red ribbon, and we are so glad she did!  Make this one as soon as possible!

-Cyndi


Caramel Apple Nachos with Nutty Dipping Sauce

Do you want the story behind these Caramel Apple Nachos with Nutty Dipping Sauce? Read on. I had the pleasure of assisting in judging the Stadium and State Fair Foods competition at the Minnesota State Fair in 2014. It was a blast! All of the entries were delicious, but this recipe really wowed me. The winner Lisa Silmser really hit it out of the ballpark! The apples were so crispy and I could not stop thinking about the nutty dipping sauce. I was excited to make this recipe for my family ASAP, and you will be too after seeing how easy these are to make!

The key to these crispy treats is to cut the apples very thinly. If you have a mandolin slicer, use it!

fresh cut apples

Preparing the apples is as simple as mixing together cinnamon and sugar, then coating the apple slices with it. Place them on a parchment lined baking sheet and they are ready to pop into the oven.

Dried apples for Caramel Apple Nachos

While the apples bake, mix together the nutty dipping sauce. It’s quick to make, so I let mine sit in the fridge while the apples finished up. I’ll admit that I repeatedly ate spoonfuls of it. I couldn’t resist! It’s that good! And make sure to save any extra dipping sauce. It’s also delicious with freshly sliced apples or even pretzels for the sweet/salty combination.

This Caramel Apple Nachos recipe is so delicious and so simple. You just have to try it! I have no doubt that it will wow you too!

And by the way, if you’re looking for more Minnesota State Fair winning recipes, search for them on our site.

-Crystal